Mickey and the Roadster Racers Birthday Board
Note: As an Amazon Associate, I earn from qualifying purchases. If you click on a link from Amazon or another of my advertising affliates, I will earn a small commission at no additional cost to you. Please see my full disclosure policy here.
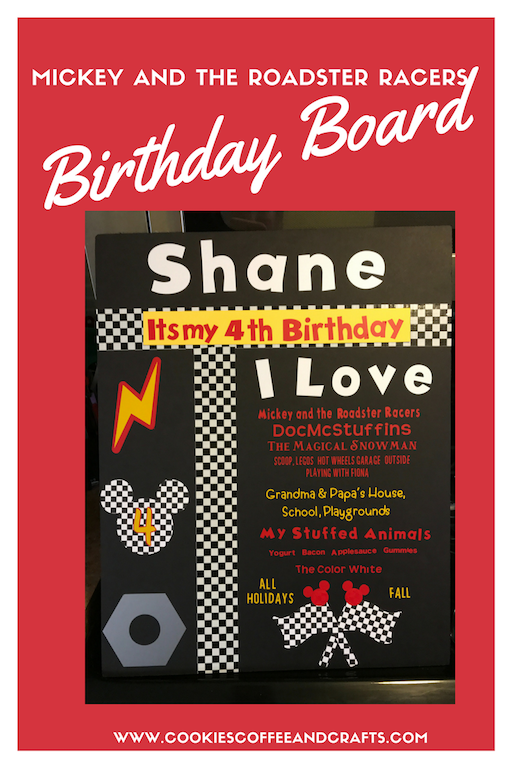
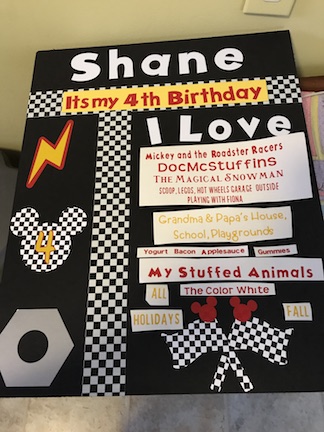
Here is another fun idea for a Mickey and the Roadster Racer Birthday Party, which is a birthday board. I had creative block (like writers block), I just couldn’t visualize the board. Last year my son’s birthday theme was Mickey Mouse, so I didn’t want it anything like his board from last year. I also wanted the board to match the other birthday decorations. I just decided to start making it (I was out of time) and my creativity started flowing when I started the board.
I love birthday boards and I’m so sad I didn’t do them sooner. I just started making them last year, so my daughter will have one for every year of her birthday, but my son’s birthday boards started at the age of 3.
A Birthday Board is an excellent way to capture your child in a moment of time and it creates an amazing memory that one day, you can look back on. There are many ways to create a birthday board, but I like to use a black foam board and vinyl. Plus this was my first time adding duct tape to a board. Using the duct tape was a stressful moment because I was so afraid of ruining the board. I use my Cricut Explore to cut out all the vinyl and use transfer paper to add it the board. I created the board in Cricut Design Space™ using my Cricut Access Premium membership.
A birthday board can be made in many different ways and you can add any information you want to the board. This time I just did his name, how old he was and put “I Love” and listed all of my son’s favorite things.
Below are some affiliate links and I may make a commission for purchases made through the following links.
Materials:
Elmer’s Foam Board Multi-Pack, Black, 16×20 Inch, Pack of 3
Duck Brand 280410 Printed Duct Tape, Checker, 1.88 Inches x 10 Yards, Single Roll
8.5×11 Sunshine Yellow Cardstock, 25 Sheets, Card Stock 67, Scrapbooking
Step 1:
Measure your board and decide on the layout to know how big to make the letters, the pictures, etc.

Step 2:
Start at the top of the board and work your way to the bottom. I like to do it section by section.

Step 3: I added the checkered flag duct tape to divide the board.

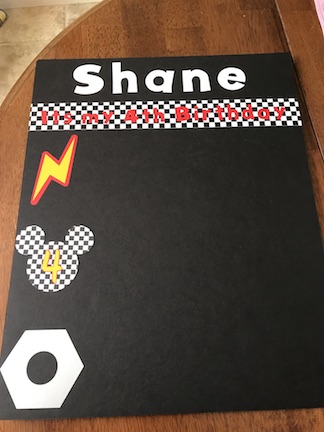
Step 4: I added “It’s my 4th Birthday” the vinyl was hard to read on the checkered flag duct tape, so I ended up peeling off the vinyl and putting it onto yellow cardstock, then I glued the cardstock on top of the duct tape. Picture 1 shows the red vinyl and picture 2 shows the letters on the cardstock, which is easier to read.


Step 5: I decided to add the images that matched the centerpiece and the photo booth board. So I used the lightning bolt, the Mickey Ears and added my sons age, and the nut and bolt. The lightning bolt, the nut and bolt, and the numeral 4 are cut out in vinyl, but the Mickey Ears are made out of checkered flag paper. The small checkered flag paper was hard to find, but this paper worked perfectly.
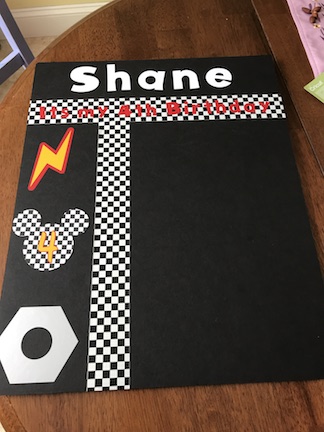
Step 6: I added the strip of duct tape next to the images to divide the birthday board.
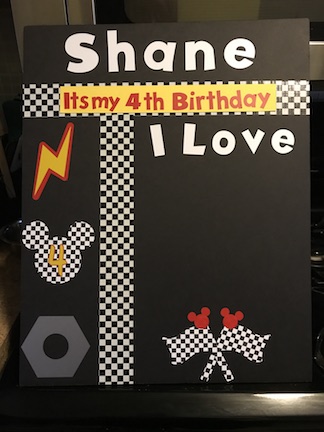
Step 7: I added “I Love” to the top of the board under the duct tape divider. I used the Disney Mickey End Caps Font (I also used it for Shane’s name) and the letters are not straight. The letters have that goofy Mickey twist to them, so they are not crooked, it’s just how they are (the letters drove me a little crazy). I also added the checkered flags with the Mickey ears at the bottom of the board so that I knew exactly how much space I had for the information of everything my son loves.
Step 8: The board is almost done. The last step is to add what your child loves. For this step (prior to making the board) ask your child what’s your favorites… Tv Show? Food? Color? Places to go? Toys? Holiday? Season? Book? Then in Cricut Design Space I typed up all of his favorites and attached certain information together and then cut it in vinyl. I did some in red & some in yellow vinyl. I’m having a hard time explaining it, but the picture is a great visual. I layed out all the vinyl on the board, before I transferred it to make sure I liked how it looked and that all the information fit (sometimes my measuring is not good).
Then if you like how it looks, use the transfer paper and add it to the board. I didn’t take any pictures of this because you can’t leave the transfer paper on to long because it will peel the black off the foam board and you don’t want that to happen after all your hard work.

I hope you enjoyed this birthday board project. If your looking for more Mickey and the Roadster Racer Ideas here are some more of my blog post.
Centerpiece
https://www.simplycraftylife.com/mickey-and-the-roadster-racers-birthday-centerpiece/
Birthday Banner
https://www.simplycraftylife.com/mickey-and-the-roadster-racers-birthday-ideas/
Photo Booth
https://www.simplycraftylife.com/mickey-and-the-roadster-racers-birthday-photo-booth/
Water Bottle
https://www.simplycraftylife.com/mickey-and-the-roadster-racer-birthday-idea/
Happy Crafting!
